If you haven’t yet seen Prismatic, strap on your virtual reality goggles and go check it out here. The rest of the article will make much more sense this way. If you are already familiar with the work (or just came back after I sent you to check it out), welcome.
In this article I’ll talk about the process behind creating and publishing Prismatic, as well as about some of the lessons learned along the way.

Quba’s Background
My work and style has been largely shaped by two of the studios I worked with in the past years. imago was an Istanbul-based motion design studio I co-founded in 2002. Being a part of the first worldwide wave of modern motion designers (and the very first mograph studio in Turkey) we had access to only a fraction of the toolset easily available to anyone today. We had to come up with hacks and runarounds – to “outsmart” the software and push it beyond what it was designed to do.
We also often operated on a shoestring budget – working either on self-initiated projects or with clients we really liked, but who could not afford expensive equipment and endless man-hours. We had to know how to do something out of nothing – to create beautiful, engaging content with minimal production costs.
It was then that I learned how to script and code in order to speed up my workflow. It was then when I begun reading medical and philosophical papers on human perception, and learning what optical trickery and illusions I can get away with.
In 2012 we have closed imago and moved to San Francisco, where I took the position of Creative Director at Autofuss – a (now defunct) studio that combined cutting-edge technology and robotics with a poetic, hand-made approach to film making and set design. In there I had the opportunity to lead numerous projects and campaigns and hone my skills in live action and creative set design.
When Autofuss got acquired by Google, I was given the chance to work with some of the most amazing technologists and engineers – and among them the Google Jump team and their amazing stereoscopic 360° camera. Together with a small Autofuss task force we participated in some of the earliest tests of this camera rig and worked alongside the Google engineers in priming it for the public debut.
From then on I didn’t really have any choice anymore – I got totally hooked on VR and knew that my future lies in creating mind-blowing content for it.
The genesis of Prismatic
Prismatic is my first independent project since I have left my position as Creative Director at Autofuss and Google a few weeks ago. It has begun its existence as a proof-of-concept animatic for a larger, practical set I am currently developing. Soon though, it took life on its own and became a self-standing animation.
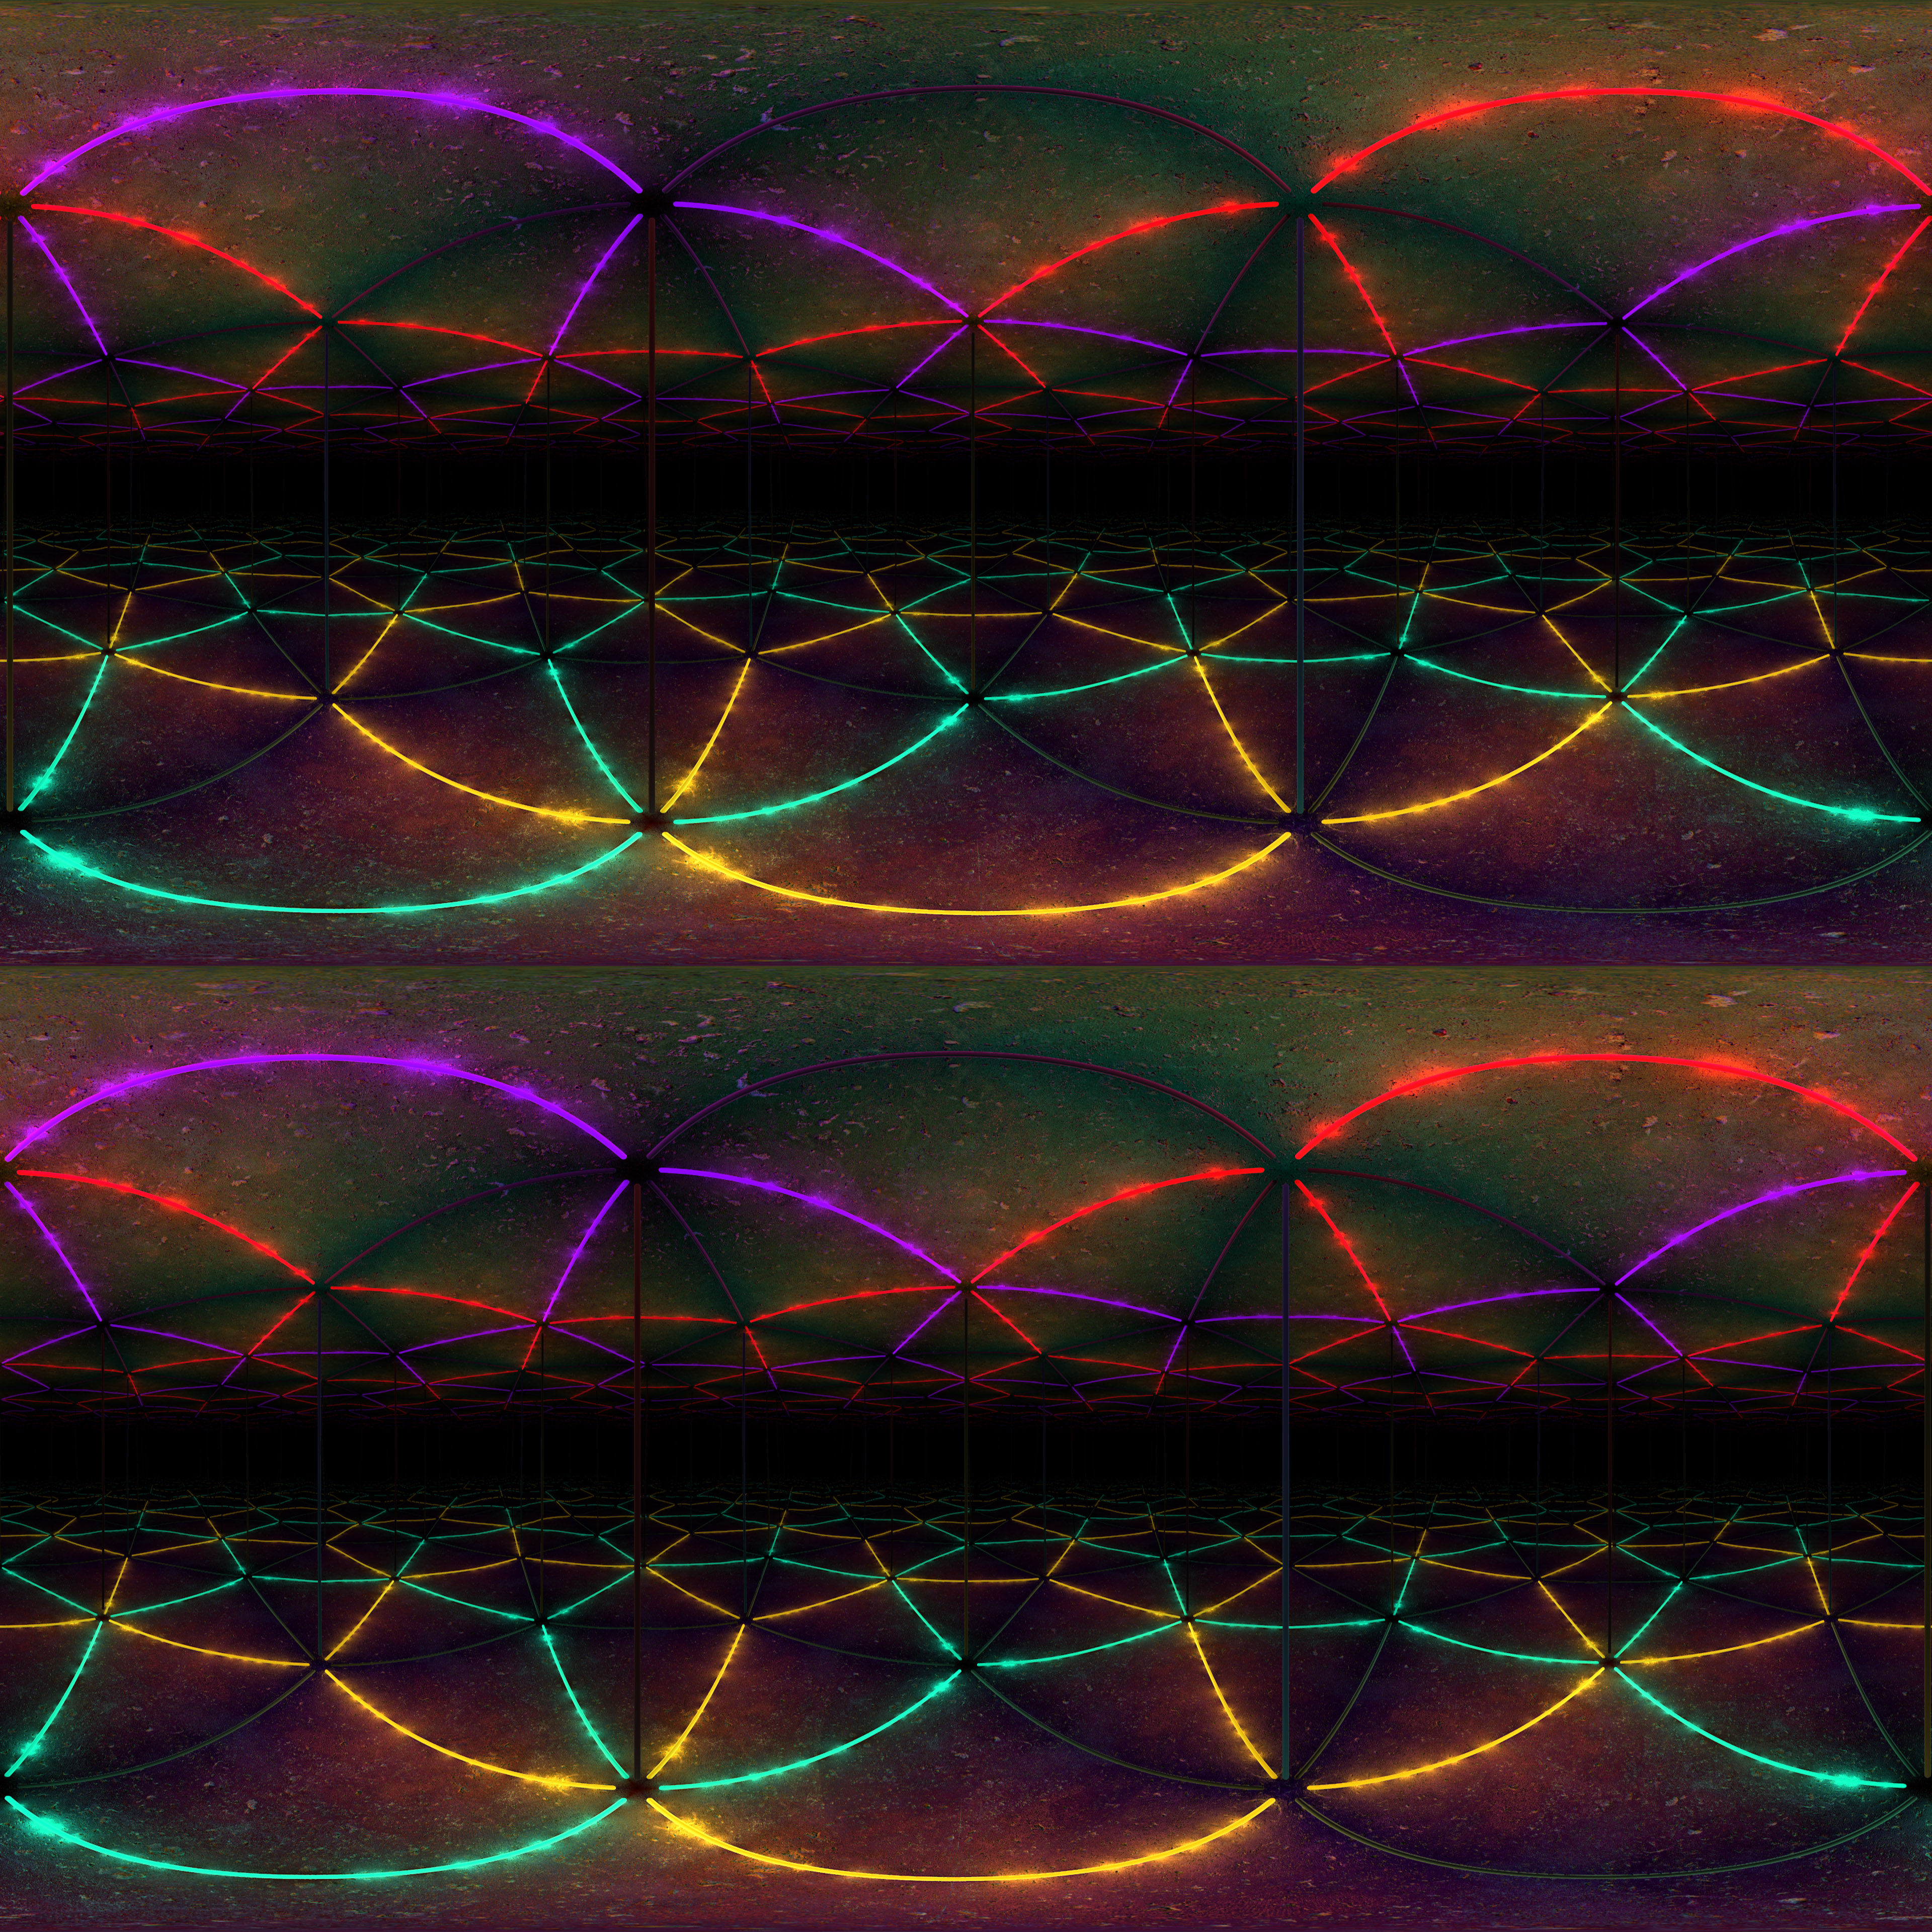
My goal was to create an interesting space and illumination using the minimal set construction requirements. I have experimented with a number of different setups, but in the end settled on a triangular array of three identical mirrors, facing inwards, with 9 colored LED strips placed as hinges on each side (here represented as long fluorescent lights). Seen from outside, the setup looks as follows:
This video can be also watched at YouTube and Vimeo.
The mirrors go around, lights on the edges, the camera’s inside. How hard can it be? I was soon to find out.
Lesson 1: GPU renders don’t like reflections
As a videogame enthusiast, I should have seen it coming miles ahead… but I did not. For the past several years I could always count on my team of designers, artists, animators and technologists to either simply do the work, or to help me out when I was at the box. This time I was flying solo and had to solve all the problems myself.
While planning my workflow for this project I assumed I will be able to leverage the speed and amazing quality of OctaneRender by OTOY – a very popular choice for physically-based rendering that also supports the built-in stereoscopic 360° camera model. It would most likely do great for any other project, but my whole concept was based on infinite reflections – a technique that requires deep raytracing – and something GPU-based renderers are not at all good at.
I had to build my own camera rig.

Lesson 2: You gotta love solving puzzles
Capturing mono 360 is a fairly straightforward process. The camera’s position remains stationary while it sweeps around to capture the scene. The most common option is to capture 6 views, each at a square aspect ratio and 90° lens angle – then to build a cube out of these 6 sides and re-project it to a rectangle using equilinear distortion. The rectangle then becomes a texture that can be wrapped on a sphere surrounding a viewer.
With stereo 360 things get a bit more complicated. The cameras need to travel on a circular path with the diameter equal to your desired Inter-Papillary Distance (IPD). As they complete each circuit, they capture each frame as a series of vertical slices and then combine them to create the final image. Or, actually, two images – one for each camera.
It has been a while since I last used Cinema 4D in person, and even longer since I touched XPRESSO – its node-based scripting engine. A testament to a good UI design though – I was able to model a rough version of my scene and build the camera rig within a day.
I very quickly encountered another wall – no matter how hard I tired I could not get the C4D cameras to give me a proper coverage of 1° horizontally by 180° vertically. Now I think is as good time as ever to make a statement:
This article talks about the way I solved the problems I encountered. I don’t claim that’s the only way, not even that it is the right way of solving them. Perhaps others have smarter solutions to the hurdles of VR production – if so, please do share them in the comments below. For what it’s worth, I hope we can all learn from this process.
Now with the disclaimer out of the way, here’s how I solved the camera coverage problem: Custom raytraced lenses. I built a test set with a carefully marked sphere and then modified the lens geometry and it’s material’s refractive index until I got the renders to cover exactly the area I needed. I then rendered each frame of the animation as a sequence of thin vertical slices, to be assembled back into a single image using a simple After Effects template I built.
Even with the custom lenses, my coverage of the poles (North all the way up and South all the way down) was somewhat blurry and distorted, so I added two extra cameras to the rig – capturing the “classic” 90° views of top and bottom. It was then just the matter of using Mettle’s Skybox plugin to match the equirectangular projection and patch the errors.

Lesson 3: Scale is everything
Having been doing a lot of abstract and graphic motion design over the years (both in 2D and 3D) I noticed that like many others, I never really thought of the scale of the things I was building. It did not matter whether in Cinema 4D my abstract metaballs were an inch, a meter or a millimeter across. As long as they made sense in relation to the objects surrounding them – everything looked fine.
The first version of the set I built together with the camera looked all wrong. I tweaked the mirror sizes. Wrong. Tweaked the lights. Still wrong. Deleted it and started again.
This time I looked at some references – doors, windows, big public mirrors and tried to mimic the proportions. Modeled. Rendered. Stitched. Loaded up in Oculus Rift DK2. Guess what?
Wrong.
Over a number of iterations, the space felt either too huge and imposing or too claustrophobic. The lights looked like pipes or strings. The text hung in weird places that did not make sense and threw the brain off. The ceiling was too close… or too far.
Then it hit me – since I am doing the CG piece that’s loosely based on a practical set, let me adopt the same principles as a craftsman building the thing for real. I threw in some humans for scale, measured walls and doors around my apartment, created a real-life sketch with a gaffer tape on the wall. Once happy with the size, I measured the area and typed in the values in the software.
Similarly, with the lights I measured the diameter of the fluorescent bulb in the bathroom and used the same dimensions. I gave the camera an IPD of 65mm (2.56″) – an approximate average for a male viewer and hung the camera at 175cm (5’9″) above ground – quite a bit shorter than myself, but again, relatively average. Originally floating in the air, the typography was moved and “glued” to one of the mirrors. For the size I approximated building it out of wood or styrofoam and used these dimensions.
Suddenly, everything fell into place. The space made sense. My eyes and my brain were able to easily comprehend it – as it had direct relationship to the world I experience everyday. To many professionals like game level designers or architects it is a no-brainer, but it took me a few days of trial and error to come to this conclusion.

Lesson 4: Test it on others…
Virtual Reality can mess around with your senses really well, especially if you are new to the experience. After a number of sessions you will develop immunity to some of the most common causes of discomfort. I used to spend a few hours every evening playing a space simulator called Elite:Dangerous on my DK2. Needless to say, my tolerance for spinning environments, flashing lights and general visual overload is pretty high.
Fortunately for me, my wife is a very talented artist and designer, not afraid to provide harsh critique when necessary. She also does not use VR much, so she was a pretty perfect test subject. Thanks to her feedback I tuned the amount of strobing in the video (oh it was much wilder) and introduced concrete floor and ceiling. The original design featured mirrors on all sides of the prism, including the top and bottom. It resulted in pretty spectacular visual… that just felt wrong.
I guess there are limits to how much of a madhouse we are willing to experience – introducing more realistic textures on the floor and ceiling helped ground the experience, and also focus the viewer’s gaze, previously totally random.
Lesson 5: …but trust your own vision
Early versions of the project featured geometrically perfect mirrors. They never felt quite right to me. While the new floor and real-life dimensions helped immerse the viewer in the experience, the mirrors felt CG or game’y. I wasn’t sold on them.
After a quick visit to the furniture store I decided to add a bit of a distortion to their geometry. It took a lot of tweaking, but in the end I think I settled on something around 3mm (0.1″) imperfection. By itself, the distortion doesn’t do much and is almost imperceptible – but as the reflections accumulate and bounce off one another, it adds that extra something that fools the brain into reading it as “real” and “manmade”.
My little test group completely disagreed with the introduction of the distortion and protested each time I made new render, but in the end I believe I made the right call and stand by my decision.
Lesson 6: The software is not ready
If you ever worked on a 4K composition in After Effects or Premiere, you know that it brings the software to its knees. That’s mono 4K. This project was mastered in 8K^2 (8K square), meaning I was working in a 7680x7680px composition. It was painfully slow.
It took ages to render the slices for each frame and then some more to stitch them together. If I wanted to sequence the whole animation in Cinema 4D, I would most likely premiere the piece sometime in December. December 2021. I had to be smart.
I ended up using the trick I learned when doing product photography. Instead of the entire scene, I rendered a single frame for each light source and then overlaid them together in After Effects using Additive mode. Now by applying simple colorization and opacity changes I was able to shift each light to any color necessary, without the need to re-render the frames.

With this method I only had to render 12 frames (plus 3 alpha mattes for the text). it still took ages, but definitely saved me a lot of time. Additional advantage of this method was that I was able to render different views of the scene and simply replace the footage in After Effects while maintaining the color sequencing. It was the ease of making it that motivated me to create the outside view video you’ve seen in the beginning of this article – and in turn write the article itself.
I ended up sequencing the whole animation using a tiny 500x500px preview render and then, once complete – loaded up the 8k^2 and let it crunch.
Lesson 7: It’s not enough to be just an artist
As soon as the video finished rendering (as a 32bit, floating point TIFF sequence) I encountered a new challenge. Adobe’s own Media Encoder did not support MP4 files with H.264 encoding that exceeded the maximum allowed pixel size of 3840×2160. I had the film completed and no way of connecting the frames together into a single movie.
I had no choice, I had to learn one of the most powerful encoding tools: ffmpeg. It’s fast, it’s powerful, it stops at nothing. The only problem is – no GUI. The entire interface with the program happens through command line. For some, this may be a daily bread – I had to spend good two days reading up on different commands, settings, order in which these commands are issued, etc. etc.
In the end I would end up creating a whole lot of batch files like this:
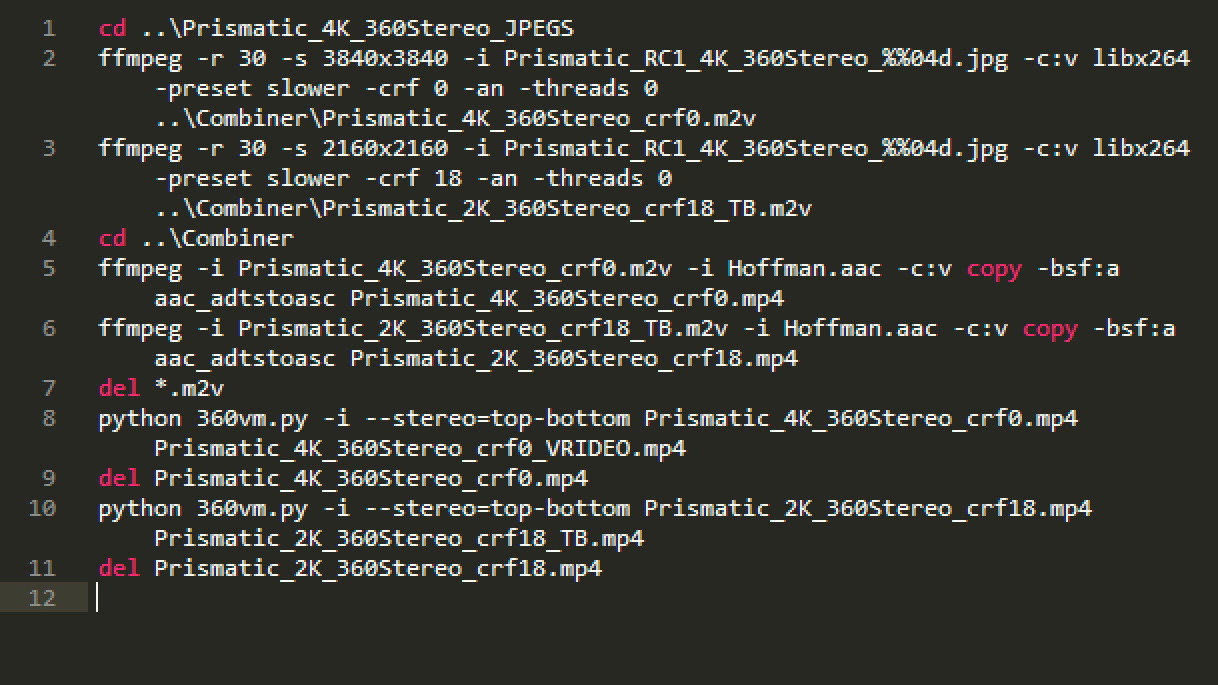
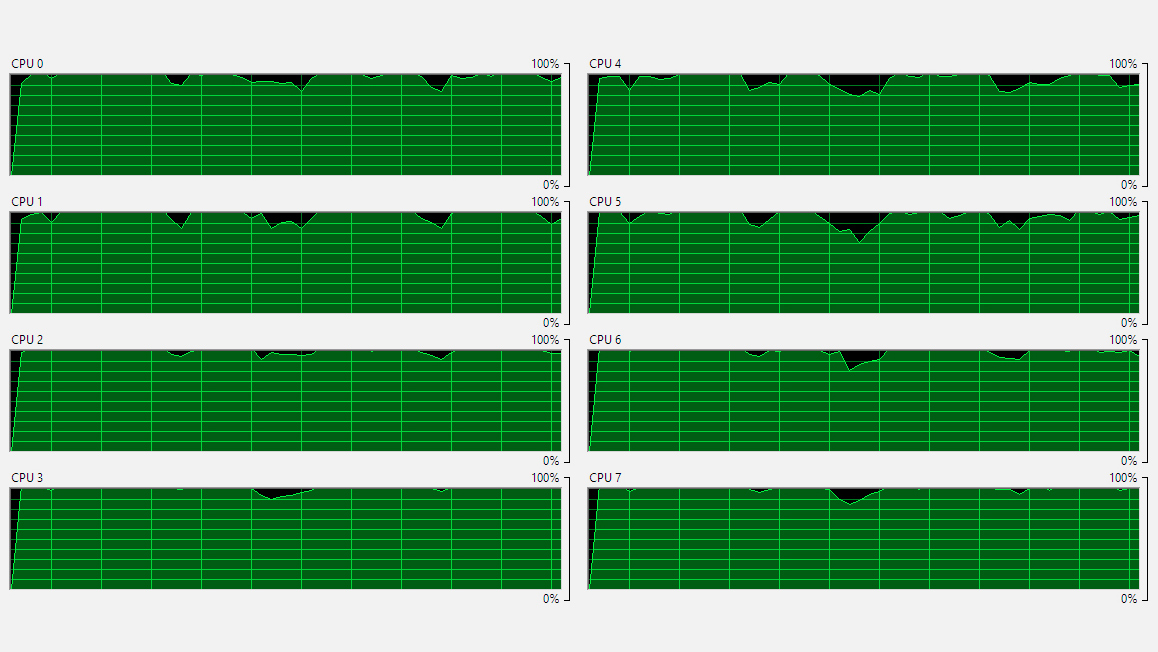
Then wait several hours, crossing fingers while my computer did this:

The big advantage of this method was that unlike GUI-based encoders, ffmpeg just does it’s job utilizing all the resources available on your machine. It does not waste processor cycles rendering the interface, providing visual feedback, progress bars, showing preview frames or dialing home for updates. The disadvantage is… well, all that – no preview, no convenient dials and UI.
Overly, out of two weeks allocated to this project – I spent less time producing the work itself than I did learning new tools, scripting, coding, solving problems. In the end I had a piece rendered on my own camera rig, using my own assembler and methodology, compressed and processed using my own batch files.
Personally, I happen to really enjoy the technical challenge – be it in front of the monitor, or on the live set, but not everyone does. This is a new territory with all the tools still in active development, alpha and beta plugins, no established methodologies. To succeed, one needs to think as an artist, and as an engineer and possibly as a coder or even a hacker.
Lesson 8: The Internet is not ready, either
The final challenge came around when the video was ready, processed and rendered in variety of sizes, bitrates and versions: How do I show it to people?
After some research on Internet forums and Reddit I arrived at the unfortunate conclusion: there is no single, unified method that will work for everyone. A number of sites supporting VR or 360 content have recently sprung out, but only one met my needs – VRideo.com. What of the others?
YouTube’s long awaited stereoscopic 360 capability has not been released to the public yet. Their mono 360 works, but could not handle all the light strobing in my video, resulting in compression artifacts so bad I decided not to share it (after uploading at least 10 different size, encoding and bitrate versions). Kolor.com is pretty popular, but with Oculus headset absent, their player would not simply play one eye, but instead stretch out both streams into a single image. It looks cool in a glitchy kinda way, but defeats the purpose. Additionally, they have a 2GB upload limit and their compression did not handle my flickering lights much better than YouTube. A number of other sites and services exist, but all had problems. Some did not support stereo, others engaged in dubious practices (ripping videos from other sites and re-uploading without authors’ knowledge)…
In the end vrideo.com “got the gig”. Their compression introduced least amount of artifacting. Their player is well designed, embeddable and responsive. They support up to 4K playback and best of all – if you have WebVR capable browser – their player will talk to Oculus, delivering correct imagery and reading the positional data. Same with the mobile platforms.
Alternatively, I could have invested some more time and created my own player app in Unity or other game engine. It’s a relatively easy process and I would be able to compile versions for all the major platforms, but dealing with testing, iTunes and Play Store approvals simply wasn’t in the timeline or in the budget (there was no budget).
Instead I decided to offer people a chance to download a 2K version, carefully compressed to play back on vast majority of VR platforms (including mobile). Additionally, I created a render using a virtual camera that simulates the viewer’s head movements. It’s definitely my least preferred way of experiencing Prismatic, but may work best for some.
In conclusion…
If you are still reading this, it means I did something right. I hope you enjoyed this little story of my two-week project. VR and 360 filmmaking is a fascinating field – full of things to be discovered, explored and learned. Prismatic was a technical exercise. A pretty light show meant to amuse and entertain for a little while.
In my future projects I will be focusing more on storytelling, creative stage design, and the balance between audiences’ autonomy and directorial control. I hope to share more works with you soon.